Quantcast
Channel: Process Integration (PI) & SOA Middleware
Viewing all 741 articles
Browse latest View live

Creating Webservice using SAP NWDS

$
0
0

Creation of Webservice using NWDS:


This blog  explains:

  1. How to Create Web Service
  2. Web Service Navigator
  3. Log Viewer


Software Prerequisite:

                Install Netweaver Development Studio in system.


Create Web Service


                To create web service in Netweaver Development Studio (NWDS) by following steps:

1.JPG


Step1:

Creating Dynamic web project in NWDS

Go to New -> project -> Others -> Web Application -> Dynamic Web Applications

2.JPG


Step 2:

Create java class file and write methods

3.JPG


Step3:

Right click the java file, select web services -> create web service. 


4.JPG

5.JPG


Web service type will be “Bottom up Java bean web Service, Service implementation will be the java file which you want to create web service.


Step 4:

Select Server hyperlink it open the following window, in that select “SAP Server” ->OK.

6.JPG


Step 5:

Select Web service Runtime hyperlink it opens following window, select “SAP server”


7.JPG


Step 6:

                Click “Next” button.

8.JPG

Step 7:

Enter service name and click “Next” button.


9.JPG

Step 8:

                Check the correct method name display in Method selection window, if yes click “Next” button.


10.JPG

Step9:

Build Archive file or ear file, Give user name and password for deploying ear file in server.

After published ear successfully in server will get alert message “Deployed completed successfully.


11.JPG


12.JPG


Step10:

Click “Finish” to complete the web service creation in NWDS.


13.JPG

Web Service Navigator


Step1:

Open the http://Testxidev:50000/index.html page in web browser.

Click “Web Service Navigator”

               14.JPG

Step2:

Enter user name and password.

15.JPG


Step3:

Enter the service name in Select service text box and click filter simple, if your service name available clicks the service name.


16.JPG

Step4:

Window open with web service method names contains WSDL URL for web service

17.JPG

Step 5:

Select the method name and open the “Enter input Parameters screen”, enter the values for the methods.

Press “Execute” method to execute the web service, after execution it open result window to display the web service details.


18.JPG


Log Viewer


Step1:

Open: http://Testxidev:50000/nwa


19.JPG


Step 2:

Press Tab Availability and Performances Management.

Click Log Viewer.

20.JPG


Step 3:

In show dropdown list select Custom view, Select Create new View.


21.JPG

22.JPG


Step4:

For filtering log file select the “Filter by Content” option, select the path as “/Applications/WebServicesCategory”.

23.JPG

24.JPG


Using SSL for Secure Communication between JMS adapter and TIBCO JMS provider

$
0
0


Depending on the protocol used, all data (including passwords) is usually transmitted through the network in plain text. To maintain the confidentiality of this data, you should apply transport-layer encryption for the message exchange.


Requirements


  • Check patchlevel of your PI/PO system (SAP Note 1832863 - SSL support for Tibco EMS)
  • Deployment of TIBCO drivers (including tibcrypt.jar)
  • SSL-enabled TIBCO JMS provider


Implementation


Create a JMS communication channel for your scenario.

  • Transport Protocol: Access JMS Provider Generically
  • Specify additional parameters:
    • JMS.QueueConnectionFactoryImpl.classname: com.tibco.tibjms.TibjmsQueueConnectionFactory
    • JMS.QueueConnectionFactoryImpl.constructor: java.lang.String ssl://yourhostname:yoursslport
    • JMS.QueueImpl.classname: com.tibco.tibjms.TibjmsQueue (can be replaced by topic class)
    • JMS.QueueImpl.constructor: java.lang.string yourqueuename
    • tibco.ssl: true (to enabled SSL communication)
    • tibco.ssl.trusted: TrustedCAs (NWA trust store where the TIBCO server or CA certificate is present)


Capture_new.PNG


Calling provider-specific factory methods


It might be necessary to set additional SSL parameters. The server certificate name in the host certificate should not be verified. Append the method call to the additional parameters:

  • JMS.QueueConnectionFactoryImpl.method.setSSLEnableVerifyHostName: java.lang.Boolean false

Capture2_new.PNG


Check the relevant TIBCO documentation for available methods. For example:

TibjmsConnectionFactory (TIBCO Enterprise Message Service)


References


Defining Generic Access to the JMS Provider - Advanced Adapter Engine - SAP Library


SAP Note 1832863 - SSL support for Tibco EMS

http://service.sap.com/sap/support/notes/1832863


SAP Note 1138877 - How to Deploy External Drivers JDBC/JMS Adapters

http://service.sap.com/sap/support/notes/1138877

File Aging Alerts Part1

$
0
0

Recently we have faced couple of issues where PI File sender channel failed to pick the file from source file server because some times it is going to hung state and some times it is getting locked for some of the business critical interfaces.


We tried to avoid the above situations by trying different options like refreshing the channel by using availability time planning and setting up time out parameter in sender File channel .Though these workarounds minimized the above situations ,client is not fully satisfied .He is looking for some thing more ...that is the situation where in order to convince the client I'm asked to write a custom module/Unix script to check the age of the files in input folders of all sender systems which uses file server .


Best options to fulfill the above requirement is to develop custom module or Unix script.I opted developing custom module to suffice the requirement  .


Custom module development:


Prerequisites:

For connecting to different source file servers and to get the file names and age of the files , i have used the Apache open source API .It is free to use


You can download the jar file from the below link.

Apache Commons Net -  Download Commons Net


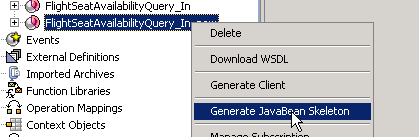
For module Creation below mentioned PI specific jar files are required.

Modules.JPG

You can refer the below link for steps to develop custom module.


http://www.sdn.sap.com/irj/scn/go/portal/prtroot/docs/library/uuid/c0b39e65-981e-2b10-1c9c-fc3f8e6747fa?overridelayout=t…


Module Code :


/**

*

*/

package com.Venkat.sappi.AgingAlerts;


//Java imports

import org.apache.commons.net.ftp.FTPClientConfig;

import org.apache.commons.net.ftp.FTPFile;

import org.apache.commons.net.ftp.FTPClient;

import org.apache.commons.net.ftp.FTPFileFilter;


import java.util.Date;

import javax.ejb.SessionBean;

import javax.ejb.SessionContext;


//Module imports

import com.sap.aii.af.lib.mp.module.Module;

import com.sap.aii.af.lib.mp.module.ModuleContext;

import com.sap.aii.af.lib.mp.module.ModuleData;

import com.sap.aii.af.lib.mp.module.ModuleException;

import com.sap.aii.af.service.auditlog.Audit;

import com.sap.engine.interfaces.messaging.api.Message;

import com.sap.engine.interfaces.messaging.api.MessageDirection;

import com.sap.engine.interfaces.messaging.api.MessageKey;

import com.sap.engine.interfaces.messaging.api.MessagePropertyKey;

import com.sap.engine.interfaces.messaging.api.PublicAPIAccessFactory;

import com.sap.engine.interfaces.messaging.api.auditlog.AuditAccess;

import com.sap.engine.interfaces.messaging.api.auditlog.AuditLogStatus;

import com.sap.engine.interfaces.messaging.api.exception.InvalidParamException;

import com.sap.tc.logging.Location;


/**

* @author : Venkat Nimmagadda

* @version : 0.1

* @Purpose : To find the age of the files and notify us.

* @Created on :01-Jun-2013

*

*/


public class AgingAlertsBean implements SessionBean, Module {


    public static final String VERSION_ID = "$Id://tc/aii/30_REL/src/_adapters/_sample/java/user/FileStatusCheckBean.java#1 $";


    static final long serialVersionUID = 7435850550539048633L;


    private Message msg = null;

    private MessageKey key = null;

    private String count;

    private String inpTag;

    private String endTag;

    private String timeInterval;

    private String Out;

    private String Check;

    private int countVal;

    private String[] server;

    private int[] subCount;

    private String[] SubCount;

    private String[] userName;

    private String[] password;

    private String[] DateFormat;

    private String[] OSType;

    private String[][] fileName;

    private String[][] fileAge;

    private int[][] fileAgeVal;

    private String[][] dirPath;

    private StringBuffer Out_Final = new StringBuffer("");

    private java.util.Date md ;

    private long diff;

    private long diffMinutes;

    private String Output;

    private SessionContext myContext;


    public void ejbRemove() {


    }


    public void ejbActivate() {


    }


    public void ejbPassivate() {


    }


    public void setSessionContext(SessionContext context) {


        myContext = context;

    }


    public ModuleData process(ModuleContext moduleContext,

            ModuleData inputModuleData) throws ModuleException {


        String SIGNATURE = "process(ModuleContext moduleContext, ModuleData inputModuleData)";

        Location location = null;

        AuditAccess audit = null;


        // Create the location always new to avoid serialisation/transient of

        // location

        try {

            location = Location.getLocation(this.getClass().getName());

        } catch (Exception t) {

            t.printStackTrace();

            ModuleException me = new ModuleException(

                    "Unable to create trace location", t);

            throw me;

        }

        try {


            msg = (Message) inputModuleData.getPrincipalData();

            if (msg.getMessageDirection().equals(MessageDirection.OUTBOUND))

                key = new MessageKey(msg.getMessageId(),

                        MessageDirection.OUTBOUND);

            else

                key = new MessageKey(msg.getMessageId(),

                        MessageDirection.INBOUND);

            audit = PublicAPIAccessFactory.getPublicAPIAccess()

            .getAuditAccess();

            audit.addAuditLogEntry(key, AuditLogStatus.SUCCESS,

            "AgingAlertsBean: Module called");


        } catch (Exception e) {


            audit.addAuditLogEntry(key, AuditLogStatus.ERROR,

            "$$$ Error while retrieving message ID/Audit trace");

        }

        if (moduleContext != null) {

            count = moduleContext.getContextData("Count");

            audit.addAuditLogEntry(key, AuditLogStatus.SUCCESS,"Input value given for \"Count\" is :" + count );


            if (count == null) {


                throw new ModuleException(

                "Specified 'Count' in Module Context is null. Please check the module configuration");

            }

            inpTag = moduleContext.getContextData("InpTag");

            audit.addAuditLogEntry(key, AuditLogStatus.SUCCESS,"Input value given for \"InpTag\" is :" + inpTag );


            if (inpTag == null) {


                throw new ModuleException(

                "Specified 'InpTag' in Module Context is null. Please check the module configuration");

            }

            endTag = moduleContext.getContextData("EndTag");

            audit.addAuditLogEntry(key, AuditLogStatus.SUCCESS,"Input value given for \"EndTag\" is :" + endTag );


            if (endTag == null) {


                throw new ModuleException(

                "Specified 'EndTag' in Module Context is null. Please check the module configuration");

            }


            countVal = Integer.parseInt(count);// converting string value to

            // int


            server = new String[countVal];

            userName = new String[countVal];

            password = new String[countVal];

            SubCount = new String[countVal];

            DateFormat = new String[countVal];

            OSType = new String[countVal];


            try{

                for (int i = 0; i < countVal; i++) {

                    SubCount[i] = moduleContext.getContextData("SubCount_"+i);

                    audit.addAuditLogEntry(key, AuditLogStatus.SUCCESS,"Input value given for \"SubCount_"+i+" is :" +SubCount[i] );


                    server[i] = moduleContext.getContextData("Server_"+ i);

                    audit.addAuditLogEntry(key, AuditLogStatus.SUCCESS,"Input value given for \"Server_"+i+" is :" +server[i] );


                    userName[i] = moduleContext.getContextData("UserName_"+i);

                    audit.addAuditLogEntry(key, AuditLogStatus.SUCCESS,"Input value given for \"UserName_"+i+" is :" +userName[i] );


                    password[i] = moduleContext.getContextData("pwd_Password_"+i);

                    audit.addAuditLogEntry(key, AuditLogStatus.SUCCESS,"Input value given for \"pwd_Password_"+i+" is :" +password[i] );


                    DateFormat[i] = moduleContext.getContextData("dateFormat_"+i);

                    audit.addAuditLogEntry(key, AuditLogStatus.SUCCESS,"Input value given for \"dateFormat_"+i+" is :" +DateFormat[i] );


                    OSType[i] = moduleContext.getContextData("osType_"+i);

                    audit.addAuditLogEntry(key, AuditLogStatus.SUCCESS,"Input value given for \"osType_"+i+" is :" +OSType[i] );


                }//closing brace for if


            }//closing brace for try

            catch(Exception e){audit.addAuditLogEntry(key, AuditLogStatus.ERROR,"Exception occured while reading input values for server ,username ,pwd and SubCount " +

                    "Error message :"+e.getMessage()+"Stack trace"+e.getStackTrace());

            throw new ModuleException("Exception occured while reading input values for server ,username ,pwd and SubCount ");


            }

            subCount = new int[countVal];

            for (int t = 0; t < countVal; t++) {

                subCount[t] = Integer.parseInt(SubCount[t]);


            }//closing brace for for


            dirPath = new String[countVal][25];

            fileName = new String[countVal][25];

            fileAge = new String[countVal][25];

            fileAgeVal = new int[countVal][25];

            try{

                for (int i = 0; i < countVal; i++) {

                    for (int j = 0; j < subCount[i]; j++) {

                        dirPath[i][j] = moduleContext.getContextData("DirPath_"+i+j);

                        audit.addAuditLogEntry(key, AuditLogStatus.SUCCESS,"Input value given for \"DirPath_"+i+j+" is :" +dirPath[i][j] );


                        fileName[i][j] = moduleContext.getContextData("FileName_"+i+j);

                        audit.addAuditLogEntry(key, AuditLogStatus.SUCCESS,"Input value given for \"FileName_"+i+j+" is :" +fileName[i][j] );


                        fileAge[i][j] = moduleContext.getContextData("FileAge_"+i+j);

                        audit.addAuditLogEntry(key, AuditLogStatus.SUCCESS,"Input value given for \"FileAge_"+i+j+" is :" +fileAge[i][j] );

                        fileAgeVal[i][j] = Integer.parseInt(fileAge[i][j]);


                    }//closing brace for forloop

                }//closing brace for forloop

            }////closing brace for try

            catch(Exception e){audit.addAuditLogEntry(key, AuditLogStatus.ERROR,"Exception occured while reading input values for Dirpath ,FileName" +

                    "Error message :"+e.getMessage()+"Stack trace"+e.getStackTrace());

            throw new ModuleException("Exception occured while reading input values for Dirpath ,FileName");


            }

        }// closing brace for if


        for (int k = 0; k < countVal; k++) {

            // Start creating a FTPClient instance:

            FTPClient client = new FTPClient();

            // Connect now to a remote FTP service:


            if(OSType[k].equalsIgnoreCase("UNIX"))

            {FTPClientConfig conf = new FTPClientConfig(FTPClientConfig.SYST_UNIX);

            conf.setDefaultDateFormatStr(DateFormat[k]);

            client.configure(conf);

            }

            if(OSType[k].equalsIgnoreCase("NT"))

            {FTPClientConfig conf = new FTPClientConfig(FTPClientConfig.SYST_NT);

            conf.setDefaultDateFormatStr(DateFormat[k]);

            client.configure(conf);

            }

            if(OSType[k].equalsIgnoreCase("AS400"))

            {FTPClientConfig conf = new FTPClientConfig(FTPClientConfig.SYST_AS400);

            conf.setDefaultDateFormatStr(DateFormat[k]);

            client.configure(conf);

            }

            if(OSType[k].equalsIgnoreCase("VMS"))

            {FTPClientConfig conf = new FTPClientConfig(FTPClientConfig.SYST_VMS);

            conf.setDefaultDateFormatStr(DateFormat[k]);

            client.configure(conf);

            }

            if(OSType[k].equalsIgnoreCase("OS2"))

            {FTPClientConfig conf = new FTPClientConfig(FTPClientConfig.SYST_OS2);

            conf.setDefaultDateFormatStr(DateFormat[k]);

            client.configure(conf);

            }

            if(OSType[k].equalsIgnoreCase("L8"))

            {FTPClientConfig conf = new FTPClientConfig(FTPClientConfig.SYST_L8);

            conf.setDefaultDateFormatStr(DateFormat[k]);

            client.configure(conf);

            }

            if(OSType[k].equalsIgnoreCase("NETWARE"))

            {FTPClientConfig conf = new FTPClientConfig(FTPClientConfig.SYST_NETWARE);

            conf.setDefaultDateFormatStr(DateFormat[k]);

            client.configure(conf);

            }

            if(OSType[k].equalsIgnoreCase("MACOS_PETER"))

            {FTPClientConfig conf = new FTPClientConfig(FTPClientConfig.SYST_MACOS_PETER);

            conf.setDefaultDateFormatStr(DateFormat[k]);

            client.configure(conf);

            }

            if(OSType[k].equalsIgnoreCase("MVS"))

            {FTPClientConfig conf = new FTPClientConfig(FTPClientConfig.SYST_MVS);

            conf.setDefaultDateFormatStr(DateFormat[k]);

            client.configure(conf);

            }

            if(OSType[k].equalsIgnoreCase("OS400"))

            {FTPClientConfig conf = new FTPClientConfig(FTPClientConfig.SYST_OS400);

            conf.setDefaultDateFormatStr(DateFormat[k]);

            client.configure(conf);

            }


            try{

                client.connect(server[k]);// connecting to ftp server

                client.login(userName[k], password[k]);// Giving credentials

                audit.addAuditLogEntry(key, AuditLogStatus.SUCCESS,"Successfully connected to server  "+ server[k] +". ");

                audit.addAuditLogEntry(key, AuditLogStatus.SUCCESS,"Successfully connected to server  "+ client.getReplyString());

            }

            catch(Exception e){

                e.printStackTrace();

                audit.addAuditLogEntry(key, AuditLogStatus.ERROR,"Exception occured while connecting to " + server[k]+" :"+"Error message :"+e.getMessage()+"Stack trace"+e.getStackTrace());

                throw new ModuleException("Exception occured while connecting to " + server[k]);

            }

            try{

                for (int l = 0; l < subCount[k]; l++) {


                    final String pattern = fileName[k][l].replace(".", "\\.").replace("*", ".*");

                    audit.addAuditLogEntry(key, AuditLogStatus.SUCCESS,

                            "Pattern : " + pattern);

                    FTPFileFilter filter = new FTPFileFilter() {

                        public boolean accept(FTPFile ftpFile) {

                            return (ftpFile.isFile() && ftpFile.getName().matches(pattern));

                        }

                    };

                    FTPFile[] fileNames ;


                    try{

                        fileNames = client.listFiles(dirPath[k][l], filter);

                        audit.addAuditLogEntry(key, AuditLogStatus.SUCCESS,"Successfully executed listNames command in the "+ server[k]+ "in directory "+dirPath[k][l]);


                    }

                    catch(Exception e){                   


                        audit.addAuditLogEntry(key, AuditLogStatus.ERROR,"Exception occured while executing listNames command in the "+ server[k]+ "in directory "+dirPath[k][l]+". Error message :"+e.getMessage()+"Stack trace"+e.getStackTrace());


                        throw new ModuleException("Exception occured while executing listNames command on server : " + server[k]);

                    }


                    for (int m = 0; m < fileNames.length; m++) {


                       audit.addAuditLogEntry(key, AuditLogStatus.SUCCESS,"Files in the server  "+server[k]+" that matched pattern are :" + fileName[k][l]);


                        try{


                            md = fileNames[m].getTimestamp().getTime();

                            audit.addAuditLogEntry(key, AuditLogStatus.SUCCESS,"Last modified time stamp for file "+fileNames[m].getName() +" is :" + fileNames[m].getTimestamp().getTime());


                        }

                        catch(java.lang.IllegalStateException e)

                        {

                            e.printStackTrace();

                            audit.addAuditLogEntry(key, AuditLogStatus.ERROR,"client is not connected or not authenticated while executing modifiedDate command");


                            throw new ModuleException("client is not connected or not authenticated while executing modifiedDate command " );

                        }

                        catch(Exception e)

                        {

                            e.printStackTrace();

                            audit.addAuditLogEntry(key, AuditLogStatus.ERROR,"Operation failed while executing modifiedDate command. "+"Error message :"+e.getMessage());


                            throw new ModuleException("Operation failed while executing modifiedDate command " );

                        }

                        Date today = new Date();

                        try{

                            diff = today.getTime() - md.getTime();

                            diffMinutes = ((diff / (60 * 1000)) - 60);

                            audit.addAuditLogEntry(key, AuditLogStatus.SUCCESS,"Time difference with respect to current time for file " +fileNames[m].getName()+ " is :              "+diffMinutes);


                        }

                        catch(Exception e)

                        {

                            e.printStackTrace();

                            throw new ModuleException("Exception occured while calculating time difference with respect to current time for file " +fileNames[m].getName());

                        }

                        try{

                            if (diffMinutes > fileAgeVal[k][l]) {


                                audit.addAuditLogEntry(key, AuditLogStatus.SUCCESS,fileNames[m].getName()+ " file has exceeded threshold time");

                                Out_Final

                                .append(

                                        fileNames[m].getName()

                                        + " in " + server[k]

                                                          + " in dir "

                                                          + dirPath[k][l]).append(System.getProperty("line.separator"));


                            }// closing brace for if

                        }catch(Exception e)

                        {

                            e.printStackTrace();

                            throw new ModuleException("Exception occured while checking age of the file " +fileNames[m].getName() );

                        }


                        //}// closing brace for if                   

                    }// closing brace for for loop

                    //java.util.Arrays.fill(fileNames,"");

                }// closing brace for for loop

                try { if (client.isConnected()) {           

                    client.logout();

                    client.disconnect();}


                }// end brace for try   

                catch (Exception e) {

                    e.printStackTrace();

                    throw new ModuleException("Exception occured while disconnecting from the server : " + server[k]);                                           

                }

            }catch (Exception e) {

                e.printStackTrace();

                throw new ModuleException("Exception occured while working on " + server[k]);                                           

            }


        }// for loop closing brace


        if (Out_Final.toString() == null

                || Out_Final.toString().trim().length() == 0) {

            Check = "NotValid";

            audit.addAuditLogEntry(key, AuditLogStatus.SUCCESS,

            "None of the files crossed the threshold time value");

        } else {

            Check = "Valid";

            //audit.addAuditLogEntry(key, AuditLogStatus.SUCCESS,

            //"Files which crossed the threshold time value are :\n"+Out_Final.toString());

        }


        Out = inpTag

        + "<Status>" + Check + "</Status>" + "<Content>"

        + Out_Final.toString()

        + "</Content>" + endTag;


        Out_Final.setLength(0);


        try {

            msg.getMainPayload().setContent(Out.getBytes("UTF-8"));

        } catch (InvalidParamException e) {


            audit.addAuditLogEntry(key, AuditLogStatus.ERROR, e.getMessage());


            throw new ModuleException(e);


        } catch (Exception e) {


            audit.addAuditLogEntry(key, AuditLogStatus.ERROR, e.getMessage());

            audit.addAuditLogEntry(key, AuditLogStatus.SUCCESS,

            "Data passed across to message stream");


            inputModuleData.setPrincipalData(msg);


            audit.addAuditLogEntry(key, AuditLogStatus.SUCCESS,

            " Data assigning to message stream Completed");

            throw new ModuleException(e);


        }

        return inputModuleData;

    }


}//closing brace for class


In Part2 of this blog i will explain how to use this custom module by developing a file to mail interface in PI .

File Aging Alerts Part2

$
0
0

  Part 2 of the blog explains how to use this custom module in PI .


Deploy the EAR file in your SAP PI server using NWDS .Now develop one File to Mail interface as below.


ESR Part:


Create below components in ESR

ESRPart.JPG

I have taken Input structure as below.It is up to you ,but make sure your module o/p structure matches to your input xml structure .

Datatype.JPG

Mapping:

Mapping.JPG


ID Part:


Create the below components in ID.

ID.JPG

In Sender communication channel/Module tab-->Give the JNDI name of the Project that you created in NWDS and add the input parameters as below.


Here I have taken a simple example to explain the usage .Here PI is polling 2 file servers to check the age of the files.

Module1.JPGModule2.JPG

Input parameters that need to pass for AgingAlerts:


InpTag:Input tag of the input xml structure

EndTag:End tag of the input xml structure


Count -->Number of file servers PI is polling (In this example i have taken 2 servers)

Server_0 -->Hostname/IP for 1st server

UserName_0/pwd_Password_0 -->Username,Password of the first server

dateFormat_0 -->OS level date format in 1st server.

osType_0 -->OS type of the first server .(UNIX,NT,AS400,VMS,OS2,L8,NETWARE,MACOS_PETER,MVS,OS400)


UNIX -->For connecting to Unix based ftp server. (Use this for Windows-NT servers which has been configured to use a unix-style listing format )

NT -->For connecting to WindowsNT based ftp server

AS400 -->For connecting to AS/400 based ftp server

VMS-->For connecting to VMS based ftp server

OS2-->For connecting to OS/2 based ftp server

L8-->Some servers return an "UNKNOWN Type: L8" message in response to the SYST command. We set this to be a Unix-type system

NETWARE-->For connecting to Netware based ftp server

MACOS_PETER -->For connecting to Mac pre OS-X  based ftp server

MVS -->For connecting to MVS based ftp server

OS400 -->For connecting to OS/400 based ftp server


SubCount_0 -->No of folders in which we are doing search for fileage in server1  (Here i'm searching in one folder )


DirPath_00 -->Directory path of the first server (increase the last 2 digits for more no.of folders within the same server)

FileName_00 -->File Name schema of the files that need search in 1st server (same as above)

FileAge_00 -->Age Limit of the above matching files in 1st server (same as above) ((Here i have given 10 minutes))


Server_1 -->Hostname/IP for 2nd server

UserName_1/pwd_Password_1 -->Username,Password of the 2nd server

dateFormat_1 -->OS level date format in 2nd server.

osType_1 -->OS type of the 2nd server .(UNIX,NT,AS400,VMS,OS2,L8,NETWARE,MACOS_PETER,MVS,OS400)


SubCount_1 -->No of folders in which we are doing search for fileage in server2  (Here i'm searching in two folders )


DirPath_10 -->Directory path of the second server  that need search

DirPath_11 -->Directory path of the second server that need search


FileName_10 -->File Name schema of the files that need search in 2nd server

FileName_11 -->File Name schema of the files that need search in 2nd server


FileAge_10 -->Age Limit of the above matching files in 2nd server (Here i have given 5 minutes)

FileAge_11 -->Age Limit of the above matching files in 2nd server  (Here i have given 5 minutes)


Above configuration values need to give very carefully .Don't jump in to the conclusion that it is not working .If you give all configuration details aptly it will work.


I tried to explain in detail with lot of patience. All the best .In Part3 of this blog i will explain by taking end to end  test case .

File Aging Alerts Part3

$
0
0

Part 3 of this blog explains usage of this custom module using end to end test case .


I'm checking age of the files in two file servers (one UNIX based file server and other Windows based file server with UNIX style of listing format)


Server1(WinsowsNT file server):


File Age limit :10 min


No files in the input folder /SAP/Outbox


Input1scr.JPG

Server2 (Unix Based file server):


Dir1:


File Age limit :5 min

Input20scr.JPG

Dir2:


File Age limit :5 min

Input21scr.JPG


Alert Mail generated:


Outputscr.JPG

In the above mail screenshot you see that it high lighted files which crossed there respective age limits .Though it takes bit more time while configuring ,once it is done you really enjoy the usage .


For your understanding i have just taken 2 servers .You can use the same for configuring to all file servers in your production environment .


You can refer to other parts of this Blog series at following links:


Part2


Part1


ELSTER (HCM) Troubleshooting Guide

Dual stack system vs Single stack system

$
0
0

Dual-stack system

SAP system that contains installations of both Application Server ABAP (and Application Server Java (AS Java).

A dual-stack system has the following characteristics:

  • Common SID for all application servers and the database
  • Common startup framework
  • Common database (with different schemas for ABAP and Java)

  Note:  SAP does not recommend to setup Dual Stack Systems except if necessary (e.g. Solution Manager)


Dual stack is required for

  • PI/XI
  • Solution Manager
  • Mobile up to NW 7.0

  Optional Use case

  • BI 7
  • ESS scenarios in dual stack
  • Java Usage Types in NetWeaver Systems (e.g. Enterprise Portal)

  SAP strategy

  • Running SAP NetWeaver application components in single stack
  • Exception: Solution Manager will stay dual stack

  SAP Application Server Setup recommendations

  • Setup SAP systems as single stack whenever possible


Single Stack system:

Single Stack system is defined as SAP system with either SAP Netweaver as ABAP or as Java as in run time.
For example:

  • Single stack Java system is SAP Enterprise Portal (EP)
  • Single stack ABAP system is SAP (ECC)


Single Stack or Dual Stack

Java (Single) Stack alone:

Almost all standard adapters including HTTP, IDOC and Proxy are all available in this stack. You need to use Integrated Configuration object for this. You are basically going to use Advance Adapter engine alone for the entire processing.

  • No persistence steps here. So you would improve performance many folds for sure.
  • Throughput is also improved very much.
  • Since 7.3, Solution Manager is available for monitoring in addition to RWB and NWA. So monitoring would not be issue.
  • If you are looking for real performance improvement, Single stack Java to go.
  • Abap mapping is not supported.
  • Message split to multiple receivers are not completely supported.
  • BPM interfaces are not seamless migration here.  SAP 7.1 and lower versions support BPEL whereas 7.3 support BPMN standards. So you might have to tweak a bit to modify existing interfaces here


Dual Stack:

If you need some specific interfaces to handle only java stack, still that is possible and increase the performance. Also if you have lot of existing interfaces that requires BPM interfaces, ABAP mapping, Multiple split /branching etc. Developer decides according to the requirement.


Useful points from Dual stack and Single stack:

  • Three different licenses for Net Weaver BPM requires a separate licensing- Double stack PI, Java Only PI and PO (PI + BPM and BRM)
  • CCBPM is not supported in single stack for that need to redesign andrebuild them in Net Weaver BPM. You need Single JAVA Stack+BPM installation model for this.
  • If you go to single stack, you have to replace the ccBPM processes. There is no migration for this, also need to replace any ABAP mappings and developments. But for the configuration there should be a migration tool available to convert classic configuration objects into Integrated Configuration objects
  • On a single stack you have different configuration objects which are called "Integrated Configuration". The classic configuration objects cannot be used on the single stack for that need to do migration.
  • Upgrade path from 7.1.1 (Dual Stack) to PO installation option or single stack installation option need to do migration.
  • ABAP proxies and XSLT mappings fine in single stack.


Difference between Dual stack system and Single Stack system:

  • Single Stack will support all adapters except WS RM and ccBPM for this you can still integrate scenarios of IDOC and RFC using single stack.
  • If you have any scenarios which require either ABAP Mapping or ccBPM you can go with the option for dual stack.
  • Unless BPMN is set up that is ccBPM scenarios are supported in Single Stack you cannot upgrade dual stack scenarios to single stack.

Channel Specific Timeout Configuration (Synchronous Interfaces)

$
0
0

From PI 7.3 AEX, we have option available to set Channel specific timeout.

By default this value is taken from NWA->Java System Properties section. This value sets a time limit for a message to wait in the PI messaging system queue i.e the time that a message can live in queue before Target System completes and return a reply. After this time limit is reached, the message expires and the MessageExpiredException is thrown.

This is applicable for Synchronous communication scenarios only and timeout value set in the channel takes precedence over system default value.

Benefits:

  • Need not change global timeout parameter; instead value can be set for particular channel.
  • Available for sender adapters for File/FTP, JDBC, RFC, SOAP, XI, HTTP (AAE), IDoc (AAE)


This will change value of parameter syncTimeout inside Message header.

Set Timeout Value:

This value will be set in Sender Channel(in milliseconds) with either of these 2 ways:

1)            Set timeout value in Sender Channel –> Advanced tab

SenderChannelTimeout12.png

2)      Set value of module parameter syncTimeout for CallSapAdapter Module key

SenderChannelTimeout22.png

In case of RFC adapter syncTimeout parameter is to be set for RFCAFBean Module.

Note: If timeout is set using both ways , Module parameter value will be used at runtime.


Inside PI Message Monitoring:

This is where actual timeout parameter is seen inside synchronous message:

MessageHeaderTimeout1.png

Once this timeout is exceeded MessageExpiredException is thrown and message goes into FAIL.

MessageCancelled1.png

References:

Setting a Channel-Specific Timeout

Introducing the Advanced Adapter Engine Extended for SAP NetWeaverPI


XML Validation of Files in PI7.31/PO

$
0
0

After reading blog’s heading many of you might say – not again, but don't worry I am not going to explain XML validation and how to use it because it's already very well documented in numerous blogs.


The objective of this blog is to show how the modes of processing step "BI" (of Staging/logging) in PI7.3x (AAE) would impact archiving of erroneous files in case of sender FTP/NFS scenarios under "Archive" or "Error" directory when XML validation gets failed. For more details about staging and logging, refer below blog:

Message Staging and Logging Options in Advanced Adapter Engine of PI 7.3x


So let me show you how XML file validation behaves when we change modes of "BI" from ICO i.e. interface specific staging.


Note - I am using PI7.31 SP09 (PO), so the modes of processing steps can be modify either from NWA globally or directly from ICO using scenario specific staging/logging (depends upon PI version). But just to keep things simple i will be changing "BI" modes from ICO but the functionality shown below will behave in same manner even if we change "BI" modes from NWA globally.


For testing purpose, i have enabled XML validation in ICO and validating file against below structure created in PI:

Capture.PNG


and File adapter settings are as below:

Capture.PNG


A) Mode of "BI" is set to "Store":

The logical flow at runtime will be:

a) Sender file adapter will pick XML file and archive the same.


b) And then XML message will be validated against its corresponding XSD.

Capture11.PNG


Error logs: Schema validation error logs can be viewed at PI's message monitoring level.

Capture12.PNG


File is archived under "Archive" folder:

Capture13.PNG


B) Mode of "BI" is set to "None":

The logical flow at runtime will be:

a) Sender file adapter will pick file and validate it against its XSD.


b) Depending upon the schema validation results file will either be send to archive or error directory.Capture.2PNG.PNG


Error logs: Mode of "BI" is set to "None", so schema validation error logs will be generated at sender adapter level.

Capture.PNG


File is dumped under "Error" folder:

Capture.PNG


References:

http://help.sap.com/saphelp_nw73ehp1/helpdata/en/da/760a67857342d090199dd29a4ae343/content.htm

Message Staging and Logging Options in Advanced Adapter Engine of PI 7.3x

Successfactor Integration with HCM system Using SAP PI

$
0
0

SAP HCM integration with Successfactor using middleware SAP PI.


Steps to integrate successfactor with SAP PI in simple steps.


  1. Download components
  2. Install the ESR objects.
  3. Axis adapter configuration and Patch update.
  4. Installation of certificates.
  5. Creating channels
  6. Creating using model configuration
  7. proxy Configuration
  8. Successfactor settings

Go gaga.


  • Download the readymade objects from SAP service market place.


          https://websmp207.sap-ag.de/swdc

marketPlaceContent.JPG


  • When you click on individual objects you will see number of components. We need to install all the downloaded components based on the SAP PI version in ESR directly.

ESR.JPG


  • Once the components are installed we need to get Axis jars deployed in the SAP PI system.


PFB the note for all the details regarding the issues.

SAP Note 1039369.


Download the below mentioned jars and follow the SAP note in order to deploy the jars.

    • axis.jar
    • commons-discovery-0.2.jar
    • commons-logging-1.0.4.jar
    • commons-net-1.0.0-dev.jar
    • wsdl4j-1.5.1.jar


To check if the jars are already deployed please hit the below mentioned link after making changes:

http://host:port/XIAxisAdapter/MessageServlet

axis_status.jpg


If you don’t get Status as ok it means there’s some issues with the deployment and redeploy the jars.


  1. Installation of certificates:  Open the URL given by successfactor team in chrome and download the certifcates as mentioned below. There will be three certificates download all the three certificates and deploy as mentioned in below steps.

cert1.JPG


  1. Steps to Deploy these Security Certificates:-
    1. Go to NetWeaver Administrator.
    2. Go to the Configuration Management tab.
    3. Choose "Certificates and Keys."
    4. Select "Trusted CAs".
    5. Click the "Import Entry" button.
    6. In the "Select Entry Type" field, choose "X.509 Certificate".
    7. In the "Enter path to certificate" field type in or navigate to the certificate file you downloaded from the Successfactors URL.
    8. Repeat steps 5-7 for the other two certificate files.
    9. Highlight Keystore/ WebServiceSecurity.
    10. Repeat steps 5-7 for each of the 3 certificate files.
    11. Rename Successfactors to *.Successfactors.com.


  • Creating Configuration Objects.
    1. As shown in the below image from ESR we already have three Process Integration Scenarios.
    2. So even configuring the entire scenario hardly takes 30 to 45 mins.


ESR Process Integration Scenrios.JPG


a.     Create two channels with SOAP(AXIS) adapter one for login and other channel for rest of the calls. Templates are available in the ESR objects and we can use to create the channel s. It contains the module parameters as well.

channel.jpg


b.     Go to ID and click on create new Configuration Scenario using Process Integration Scenario(radio button selected).

ID_Config1.JPG


        model.jpg


c.     Map all the mapping objects and for login operation we will use login channel and for rest all receiver end we will use other channel.


model2.jpg


d.     Once the mapping object and channels are mapped click on apply and generate the objects.


  • Proxy configuration on HCM system: BASIS consultant would do the Proxy configuration


  • Successfactor settings to be done by Successfactor consultant.


I would like to thank my colleague Madhu and Ashok who helped me to implement this scenario. This might not be the perfect document but its an attempt from my end to help to implement integration. Any feedback will highly appreciated.


References and helpful blogs :


PI.DOC– Integration between Non-SAP System and Successfactors BizX. - Part I


thanks Prabhat your blog was really helpful.


SAP HCM and SuccessFactors BizX Integration Using SAP PI


http://help.sap.com/erp_sfi_addon20/

Step by Step to Update the Mail Attachment in AL11 using Mail, NFS adapter through SAP PI

$
0
0

Purpose:


  To Update the Mail Attachment in AL11 using Mail, NFS adapter through SAP PI.


ESR Configuration:


Step 1:

Create datatype for source and target


dt1.JPG

Step 2:

Create message type based on the data type

mt.JPG


Step 3:

Create service interface as outbound for mail and inbound for AL11


SI.JPG

Note:

Message mapping and Operation mapping not required


ID Configuration:


Step 1:

Create Business Component for sender (mail) and receiver(NFS)


Step 2:

Create sender communication channel by using mail adapter with POP3 mail url and port number

Note: Enable the keep attachment

CC S.JPG


Sender Module Key Configuration:

Creating module key using PayloadSwapBean

Mk S.JPG


Step 3:

Create receiver channel for AL11 using NFS adapter


CC T.JPG


Receiver Module Key Configuration:

Creating module key using DynamicConfigurationBean

mk T.JPG


Step 4:

Create Receiver Determination


Step 5:

Create Interface Determination


Step 6:

Create Sender agreement


Step 7:

Create Receiver agreement


Testing:


Sending a mail with attachment:


test mail.JPG

Check in SXMB_MONI for successful:

monit.JPG


Check in AL11 path:


al11.JPG

How can send mail alert for PI SM58 error?

$
0
0

How can send mail alert  for  SM58 error occurred in PI syetem?

Debugging Java applications on SAP PI/PO

$
0
0

Below are the steps to debug any Java application on SAP PI/PO - they are generic for SAP AS Java server .It can be used to debug Java mappings, Java proxy calls in PI etc.


-Log on to SAP management console and click on developer trace. There is documentation of SAP AS Java ports here.


http://help.sap.com/saphelp_nwpi71/helpdata/en/a2/f9d7fed2adc340ab462ae159d19509/content.htm


However, it’s easiest to just look at the Developer Trace and get the port number. You may need to ask Basis to supply this information as it requires access to SAP management console.


- In this case, the debugging port is  50021 .


- From SAP management console, enable debugging.


-The port number  can also be verified by looking at debugging “Switched on (50021)” column.


- To debug the application, create a debug configuration in NWDS. It can be selected from Run -> Debug Configurations.


Use 'Remote Java Application' as the application type.


-Create the configuration specifying the project name and click on Debug.


- This launches the debug mode.Confirm to use the debug mode.


- We’re ready to start debugging the Java code.


The code can be any Java object :

- I tested with  SAP PI Java mapping - in this case you have to let the map execute by processing a message.


- This example is a SAP Java proxy I was testing and had issues in figuring out the error. Hence, I created a simple Servlet which fires a message.


and the Servlet can be executed allowing us to debug any J2EE application component.


I hope it’s useful for SAP PI developers as especially with single Java stack, there are going to be more Java objects created and being able to debug is efficient.


Furthermore, in PI Java mappings sometimes we need the actual data and environment to test the application and making a dummy call from main to call transform / execute can't doesn't provide the information. An instance of this could be a JDBC call to read a PI table.

Integrating SFDC with ECC using SAP PI 7.31

$
0
0

SFDC is an on-demand CRM tool, based on Cloud Computing Concept. Cloud computing, is used to describe a variety of different types of computing concepts that involve a large number of computers connected through Internet. SFDC CRM is preferred as it is less expensive, supports easy upgrades, better Service Delivery and it is easier to customize. Integration of ECC and SFDC CRM required because it offers high reliability, high performance,
high security.

In our project requirement client has decided to use SFDC CRM solution. SAP PI is used as a Middleware to perform the ECC and SFDC integration. Multiple data integration was implemented:Product Master, Invoices, Vendor Master, Customer Master, Vendor Contract etc.


SFDC Inbound integration: In case of data needs to send from SFDC to ECC, the integration is similar to any other SOAP to ECC interface.

SFDC Outbound integration: In case of data is to be posted to SFDC from ECC, the integration is based on two way communication using Java Mapping, soap look up.

In this blog, the focus is on SFDC outbound integration.Let us first see how this entire process works using SOAP UI :


First step is to have 2 wsdl files, login wsdl and other data wsdl. Here we will see Product Master Data post. WSDL files can either be downloaded from SFDC site with valid credentials or client should provide you.

  1. First Create a project in SOAP UI, Call the login request, Set Login Credentials, Check target URL and execute it.

Login Request.jpg

   2. Response received from SFDC contains, server URL and session ID, which is required to embed in SOAP envelope while making the product master data call to SFDC.

Login Response.jpg

     3.Product Master Call: create a project in SOAP UI, call the Product Master Upsert request,set the Session ID, check target URL and execute.

Product Master Request.jpg

     4. If the data is posted successfully to SFDC CRM, the response received is true. Otherwise, there can be other response messages depending upon the error encountered like false or INVALID_SESSION_ID.

Response.jpg


Implementation Details (using PI 7.31) 

PI as middleware to send login request to SFDC, receive session ID and the preform required data update/insert call to SFDC system. Steps involved are:

ESR:

Import IDoc definition

Import Product Master WSDL provided by Salesforce as External Definition

Create Message Mapping with IDoc and Product Master external definition

Develop Java Mapping for

Login request Call using SOAP Look Up feature

Receive Session ID in Login response

Build SOAP Envelope around target message with the session id

Import the java mapping as Imported Archive

Create Operation Mapping - Use JAVA mapping subsequent to the IDoc to Product message mapping  as shown below:

OM.jpg

Operation mapping test can be performed to see how the SOAP envelope is added:

Step 1 Graphical mapping result:

MM1.jpg

Step 1 to 2 result :

MM2.jpg

For the SOAP Look up, one SOAP Receiver Login Channel is required.Here set the target url as that of login request url and set the SOAP Action as login. The Login SOAP receiver channel should be linked with a receiver agreement to make a call to SFDC system. Dummy Iflow should be created with
Login SOAP receiver channel and dummy interface.

CC1.jpg

Second SOAP Receiver channel is required to perform Product Master Data post call. Set the Target URL and SOAP Action, Check ‘Do not Use SOAP Envelope’ as we are building it dynamically using JAVA mapping and set the module MessageTransformBean with parameter Content Type : text/xml.

CC2.jpg

The runtime monitoring for SFDC interfaces is performed exactly similar to other interfaces, using channel and message monitoring.


Important Points while developing the SFDC interface:

PI development and quality server connects to Sandbox URL of Salesforce.com, whereas production server connects to different SFDC URL. Make sure to change the URL in Communication Channel post production transport.


For the Sandbox and production SFDC systems, the login credentials would differ. Make sure to update the user id and password in java mapping before transporting the objects to Production.


The SOAP action parameter defined in adapters is case sensitive. Make sure to specify the actions correctly.


If the Data is not successfully getting posted to SFDC, in such cases SOAP receiver adapter returns a generic 500 HTTP_EXCEPTION error.To debug the issue, copy the payload and trigger the data from SOAP UI to see the exact error description.


Here are some frequent issues which encounters error:

Invalid Session ID, Incorrect target address URL , Incorrect Login credentials ,Incorrect module configuration (sequence, parameter) in channel, Missing dummy Iflow for login request, Date format or data formants mismatch between PI and SFDC.


Java Mapping Reference llink : http://wiki.scn.sap.com/wiki/display/XI/SFDC+Integration+using+PI+7.1+-+How+to+add+SOAP+Envelope+in+Java+Mapping?original_fqdn=wiki.sdn.sap.com

IFG Survey: Central PI Monitoring with SAP Solution Manager

$
0
0

the IFG PI Survey in 2013 showed that users still see monitoring as one of their key pain points. To gain a better understanding about the current situation and requirements, the International Focus Group for PI (IFG for PI) and SAP have decided to conduct a follow-up survey with focus on the central PI monitoring with SAP Solution Manager.


Target Group

Target group of this survey are customers who already use SAP Solution Manager for central monitoring of their SAP NetWeaver PI / PO environment or who have evaluated it.


The survey can be accessed by the following URL:

https://www.surveymonkey.com/s/LN3XWXX


Time Schedule and Survey Results

The survey is scheduled from January 27th till February 14th. An overview of the survey results will be published on SCN. The complete results will be forwarded via email to all survey participants.


References to other SCN Blogs


POV: SAP PI/PO on HANA

$
0
0

Main features of SAP HANA Database Platform include In-Memory Database, Parallel Processing, Columnar and Row-Based Data Storage and Compression. Do these features which are best appealing for a HANA switch in case of BW or SAP Business Suite, impose a valid business case for PI/PO to have HANA as backend database?


Unlike SAP Business Suite, in PI we do not have huge demand for transactions or reports that typically take a long time or data-intensive. All PI objects have always been in runtime cache. In Production environments, we archive the messages from the database every few days.


One compelling use case for HANA in PI/PO product portfolio is the new SAP Operational Process Intelligence, Opint. Typically, any significant business process spans multiple Systems - SAP, Middleware/BPM and one or more legacy/downstream/satellite systems. To be just aware of the status of an Inquiry, Purchase Order or a Delivery, business users need to communicate with multiple business application owners, and when things go wrong in any of these systems, need to speak to multiple IT Support folks in different technologies SAP/Middleware/Legacy etc…which is anything but productive. This will only get complicated as we talk about critical BIG processes in the Organizations. We have seen Business asking, how I can reconcile, did anything got lost and where it got lost etc…If we are still bogged down in getting the status of one complete process instance, how can we guide these processes towards the required Business Goals, Volumes, KPIs and SLAs and then getting into optimizations (curb the weak spots etc..) and finally process innovations.


SAP Operational Process Intelligence, Opint is a new SAP HANA-based technology solution that enables process participants and lines of business managers to drive the execution of their operational business processes through process visibility and performance management by defining their goals, milestones, and KPI's and measuring the process success along easy-to-understand process phases, simulations, and predictions. SAP Operational Process Intelligence can leverage a variety of operational data providers from SAP and non-SAP to rapidly build real-time process intelligence solution. Using Opint, Business users can get a clear and complete process view and answer typical analytical questions like how many sales orders are created for a particular customer or how many deliveries are missing the target dates or what is the % completion on time etc. This enriches the business user experience and productivity. SAP Opint is planned for co-deployment with PI/PO on HANA.


While Opint and the planned co-deployment of PI/PO and Opint are great functionality use cases for HANA in PI/PO product portfolio, we hope to see if SAP publishes any metrics on apparent performance benefits of In-Memory Computing and Parallel Processing in PI/PO like handling of - large/huge files (for instance end-of-day POS files in Retail) or increased message sizes or XSLT mappings and in general PI/PO optimizations for HANA.

Implementing Sender Receiver Java proxy scenario in SAP PO/PI

$
0
0

I have been doing some work of late with Java proxies on SAP PO .I tried to use product documentation to understand their working. Product documentation is always the best source of information but things are much clearer  for me after I've already developed something using a concrete example.


I hope that this post will be useful for anyone trying out SAP PI Java proxies. Here both the sender as well as receiver are Java proxies and it has been implemented on a 7.31 SAP PO system.


Scenario: We’ll use the flight demo model scenario with two Java proxies - interfaces FlightSeatAvailabilityQuery_Out_new for outbound service call and FlightSeatAvailabilityQuery_In_new for inbound service implementation.


Broadly, we’ll have three major objects:


Sender Proxy ( Consumer ) - Being sender, this proxy doesn’t provide any service but is used to make the outbound service call.


Receiver Proxy - It has the actual service implementation .


Servlet ( for testing ) - As the proxy calls are to be in an JEE environment, we’ll create a simple Servlet for testing.


At a high level, the below diagram shows what we’ll end up creating. We’ll need to create a configuration scenario as well but that shouldn’t cause too much grief.


We need to create the below projects in NWDS. The names in italics are our project names.


a) Dynamic Web Project  ( JavaProxyWeb ). This will hold  consumer proxy (sender objects) and servlet used for testing.


b) EJB Project ( JavaProxy ) : This will hold service implementation on the receiver side.


c) EAR (JavaProxyEAR) - EAR to deploy JEE objects.


So we have the below three projects to start our work..


Consumer Proxy Generation


Let’s generate code on the sending side ( consumer proxy ) . We don’t want to chose a Javabean as there is no actual service implementation. We’re just generating client to call our proxy and hence chose “Generate Client”.


.


In the next screen , check the values of Server/ WebService runtime and verify your Dynamic Web Project and EAR project are chosen.


And we don’t have to WSDL as we’re not really using the end-points for any service all . We’ll be creating a configuration scenario in PI Designer to generate the configuration.


After that, let the wizard go through default values and just press finish.


Inbound Service Generation


For our inbound service implementation, let’s take the corresponding service interface. This time we want to generate a bean and hence chose “Generate JavaBean Skeleton”.


And as we’re not really going to use any client, we can move the slider for client to minimum and just generate the shell for the Web Service.


Our EJB project looks something like this.


And the web project should look similar to this.


Adding Servlet to web project ( for testing )


As we need a servlet for testing, let’s create one in our web project.


Additions to servlet which makes the outbound proxy call object


Add the WebService annotation with the service name and create an instance of the Service.


This is the outbound service call. We need to create an instance of port and as we’re using XI as the message protocol, we need to use methods from XIManagementInterface.


and the actual proxy call to get the result.


We have set the business system programmatically. It’s also possible to not set it here and instead set Party and Sender Service in configuration for Java proxies ( this appears once the project is deployed ) in Port Configuration.


Inbound Service Implementation


For the inbound service implementation, we’ll need to add @XIEnabled annotation and it’ll need @TransportBindingRT as well. Add @XIEnabled and IDE will help with @TransportBindingRT as they’re required together.


Project Deployment


Our EAR has our EJB as well as dynamic web project.Deploy the EAR .


Service verification in NWA


Once the project is successfully deployed, we should be able to find our consumer proxy . This was actually confusing for me. I tried to deploy the generated client without the actual service call in servlet and it never worked for me. Only when I created the servlet making the outbound call I could see the outbound proxy. It’s best to finish outbound proxy and inbound service implementation along with consumer application ( servlet in this case ) and then try to deploy them in one shot.


Below is the screenshot of the port configuration . We can set the party/ business system here if it’s not set programmatically.


Similarly, the inbound service shows up as well in Service Definitions.


Our development is done. Now, we need to create  an integration flow  with the required sender / receiver interface values.


Sender communication channel uses XI message protocol for a SOAP adapter and HTTP as the transport protocol.


Similarly, create a receiver communication channel of type SOAP, using HTTP as transport protocol and XI as message protocol.


Path prefix for sending proxy messages bia JPR is /MessagingSystem/receive/JPR/XI.


Do a test with the URL going to be used on the receiving side to verify it’s running.


Now, configure the receiver communication channel. Change the authentication mode to “Use logon data to no-SAP system’ and provide

authentication credentials.


Activate the iFLow and we’re ready to test the set up.


Testing


Fire the servlet and it should come up with the below screen


Put  your flight and connection details. We aren’t really using the date and hence it’s not in screen.


And if everything goes well, we should get the below screen.


Voila ! Our proxy worked and it has come back with the response.


This matches with our service implementation - we’re just returning 20 free and 200 max business class seats .


The message can be displayed in RWB / PIMON.


The audit log confirms that JPR has successfully delivered the message along with the response message.


The source code is available on https://github.com/viksingh/PIJavaProxy . I've just put the outbound proxy call in the servlet and the inbound service implementation as these are the two files we need to modify. Rest all were left standard including deployment descriptors.


Generic PI Async-Sync Bridge Configuration for Any Adapters

$
0
0

PI provides async-sync bridge for the JMS adapter.  The configuration is well documented in SAP Help and various blogs and documents on SCN. The configuration involves JMS specific parameters, e.g. JMS correlation id.  These parameters are not valid or available for other types of adapters that can process asynchronous messages, e.g. File, JDBC, Mail, IDoc.


In this blog, we will take a look at another configuration option that can use the async-sync bridge, but without any JMS-type of dependencies.  The configuration is generic; therefore, we can use any asynchronous communication channels without any other changes.  This means for JMS, we will not have to deal with all the special JMS async-sync bridge configurations; you will only need to configure JMS communication channel as a “normal” configuration.


Below denotes the basic integration flows:

  pic1.png

The following interfaces are needed:

  1. Asynchronous outbound request interface from the Sender side
  2. Asynchronous inbound response interface from the Receiver side
  3. Synchronous inbound interface to the Receiver
  4. Asynchronous outbound response interface from the Receiver  (this interface should be based on the response message of the synchronous interface in #3)


The following Integrated Configurations (or iFlows) are needed:

  • Asynchronous outbound request interface (#1) --> Synchronous inbound interface (#3)
    1. For Operations Mapping, only the request message type needs to be mapped
    2. The synchronous Receiver Communication Channel needs to have the following module configurations added (example of a SOAP web service):

pic2.png

Please note the processing sequence.  They must be in the order as above.  The 2 additional modules are:

      • AF_Modules/RequestResponseBean  (Module Key: RequestResponseBean)
      • AF_Modules/ResponseOnewayBean  (Module Key: ResponseOnewayBean module)
      • The Module Key can be any name you want.  Here is just an example.


The Module Key’s Parameter Names and Values are:

      • RequestResponseBean:  passThrough = true
      • ResponseOnewayBean module:  interface = interface name for #4 above
      • ResponseOnewayBean module:  interfaceNamespace = interface namespace for #4 above
      • ResponseOnewayBean module:  replaceInterface = true


Note:  The rest of the configurations are the same as the standard configurations.


  • Asynchronous outbound response interface of the receiver (#4) --> Asynchronous inbound response interface (#2) :
    1. The sender communication channel must be an asynchronous sender.  In this example, it is an asynchronous SOAP sender communication channel.
    2. When creating the ICO (or iFlow), you must specify a receiver.  The receiver is the business system/component to receive the response.

pic3.png

Note:  All other configurations are the same as the standard configurations.


For my testing, I used (on the sender side) a File sender communication channel and a File receiver communication channel.  Then I replace the File communication channels with JMS communication channels. Everything worked just as well without making any other changes.

BPM Regeneration and Activation.

$
0
0

Hi dear,


We had problems with the cache and messages sent to BPE still queued.


If you have done changes on your BPM and you see that the changes dont take effect in runtime time. Or in addiction, if you send message to star a BPM and the BPM can not start. It is due to you have a cache problem. But you could reactivate your bpm by yourself and solve it.


From SXI_CACHE you can regenerate a BPM. So you should go to sxi_cache and doble clic in Integration Processes. Find the BPM you have to reactivate and do click on Repeat Activation button (the stick).


ScreenHunter_126 Jan. 29 12.27.jpg


Now, you have to do clic in New Deployment. 


ScreenHunter_127 Jan. 29 12.30.jpg


Also, comfirm the action doing clic on Yes.


ScreenHunter_128 Jan. 29 12.30.jpg


Now, you wait a few seconds and you can see a confirmation message with BPM steps and BPEL definition. Down the screen you can see activation errors.


Now, you have to check if the event listener is set green. So you have to do clic on Display Active Version button.


ScreenHunter_128 Jan. 29 12.37.jpg


And  clic on Basic Data button (the hat).


Finally, you do clic on Start Event. And if the listener is active you can see in green color the event in bellow table.


ScreenHunter_128 Jan. 29 12.47.jpg


Addressing HTTP Requests to the Specific Server Node in AS Java 7.1 and Higher

$
0
0

Sometimes it is necessary to make the HTTP request executed on the particular server node of the J2EE instance and prevent ICM from load balancing the incoming request across running server nodes of the J2EE instance. For example, some tools deployed on AS Java of the SAP PI system are capable of collecting useful runtime information only from the server node on which they are run, and not from the whole cluster or at least all cluster nodes of the given J2EE instance (assuming there are at least two server nodes being configured and running on each of J2EE instances).


This kind of requirement can be easily achieved by minor enhancement of the constructed URL that is used when sending the HTTP request. Precisely speaking, we can use the parameter sap-nodeid with the value of the server node on which the request has to be executed, the parameter has to be specified at the end of the URL and has to be assigned the value of the valid server node identifier.


To demonstrate this behavior, let us sequentially send two HTTP requests to two different server nodes of the same J2EE instance of the SAP PO system. Core part of the URL (that is identical in both requests) is complemented with the mentioned parameter. In sake of better visibility of the described behavior, document cookies are displayed in the browser as well: IDs of the J2EE instance and its server node on which the request was actually executed are displayed there (see load balancing cookie SAPLB):


01.png


02.png


In order to use this functionality, it is necessary to:

  • Enable supportability of the parameter sap-nodeid in ICM of the J2EE instance (profile parameter icm/HTTP/ASJava/enable_sap_nodeid needs to be set with value TRUE– by default, this parameter is not specified and the parameter sap-nodeid is ignored on the server side);
  • Ensure that the HTTP request does not contain session ID (cookie JSESSIONID) - otherwise, the parameter sap-nodeid will be ignored on the server side. (in this demo, we used incognito mode in Google Chrome in order to achieve this).


Note: if the invalid server node identifier is specified in the parameter sap-nodeid, the HTTP request will not be redirected to running server nodes of the accessed J2EE instance - instead, the HTTP error 503 ("Service not available") will be retured by ICM of the J2EE instance.


Attention: the described technique is not intended for common usage since it ignores J2EE instance internal load balancing principles using ICM and leads to uneven distribution of HTTP load across instance’s server nodes.


For additional information on this topic, check SAP Notes 1440724 ("Addressing server nodes directly in AS Java") and 1894823 ("How to be balanced to one JAVA node directly").

Viewing all 741 articles
Browse latest View live


<script src="https://jsc.adskeeper.com/r/s/rssing.com.1596347.js" async> </script>